| Advanced ColdFusion Administration |
|
|
Configuring ColdFusion Clusters |
|
| Advanced ColdFusion Administration |
|
|
Configuring ColdFusion Clusters |
|
If you have successfully installed ClusterCATS, you are ready to create server clusters.
This section explains the following:
You can create clusters using the Cluster Setup Wizard or manually using the ClusterCATS Explorer. It is easier and quicker to create and configure clusters completely using the Cluster Setup Wizard.
This section describes how to create clusters both ways:
The ClusterCATS Explorer includes the Cluster Setup Wizard that makes creating and configuring clusters easy. The Wizard walks you through the required definition and configuration steps. After creating a cluster with the Wizard, you can use the ClusterCATS Explorer to make any necessary changes.
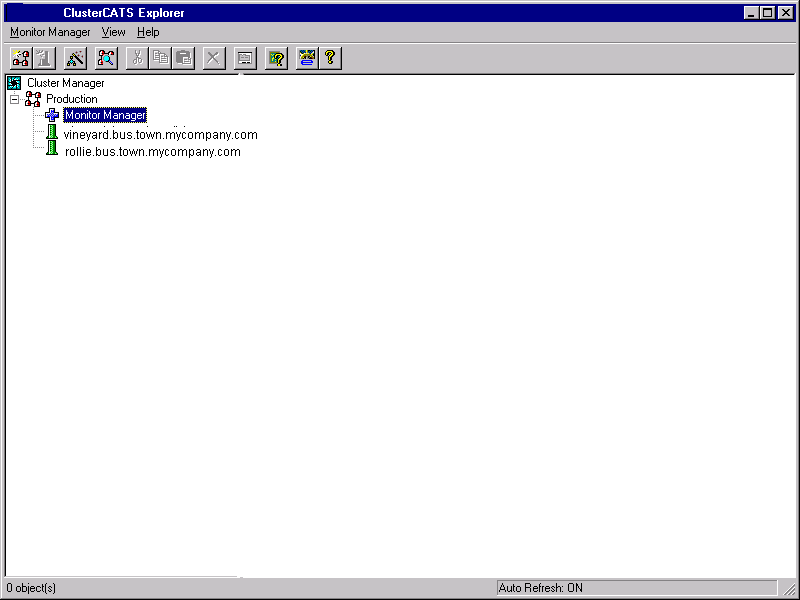
The ClusterCATS Explorer opens:
The Create New Cluster dialog box appears:
GoColdFusion in the License Key field and click Next.|
Note The License Key field is case-sensitive, so be sure to enter the key exactly as shown in this step. |
Make your cluster names logically consistent with their purpose. For example, Sales Web, Customer Support Web, and so on.
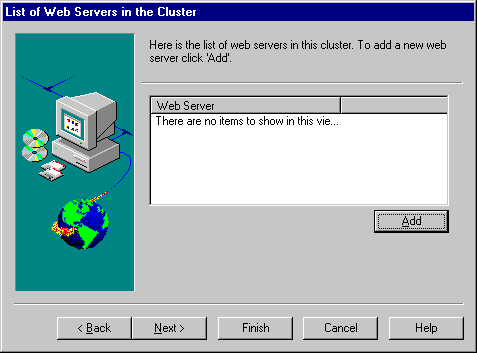
The List of Web Servers dialog box appears:
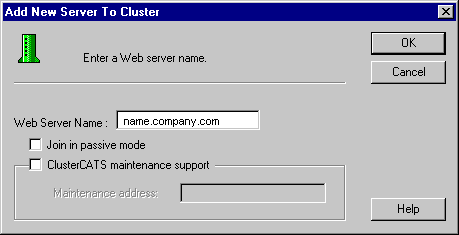
The Add New Server dialog box appears:
doc.allaire.com).If you are not configuring this Web server for offline maintenance support, go to step 8.
|
Note You can only set the maintenance support option when creating a cluster or adding a cluster member to a cluster. You cannot configure or modify this option after you have created and added the cluster member to the cluster. |
Enabling maintenance support for clusters requires that you configure your cluster for ClusterCATS dynamic IP addressing. For more information, see "ClusterCATS Dynamic IP Addressing (Windows only)".
serv1.yourcompany.com) in the Maintenance Address field.The Load Management dialog box appears:
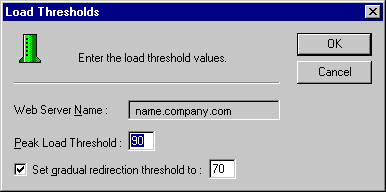
The Load Thresholds dialog box appears:
and Gradual Redirect fields and click OK.Be sure to keep your Peak load threshold below 100% to accommodate ColdFusion's processing needs. Set your Gradual Redirection threshold to be lower than your peak threshold.
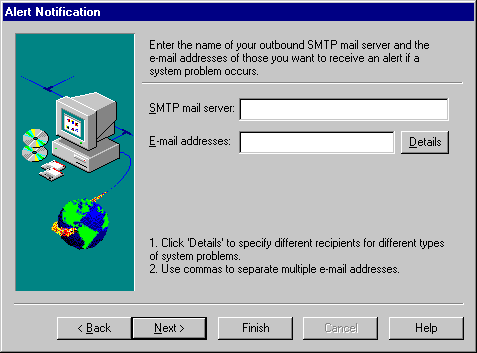
The Alert Notification dialog box appears:
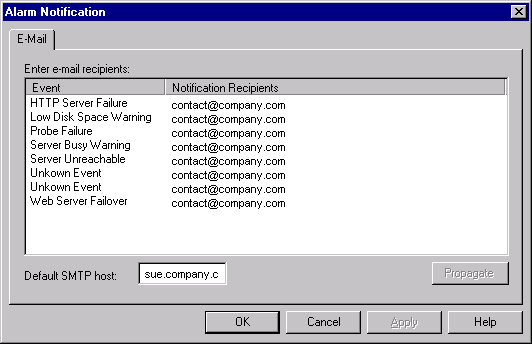
The Alarm Notification dialog box appears:
If you want the same person to receive the majority of alerts, click Propagate to automatically fill each event's Recipient column with the same e-mail address. You can then manually change the few recipients that are different. If there are multiple recipients for the same alert event, separate your e-mail address entries with commas. Click OK to return to the Alarm Notifications dialog box and then click Next to proceed.
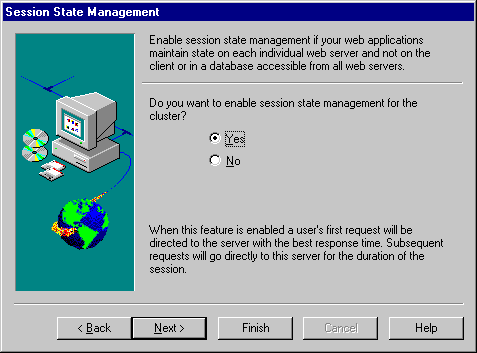
The Session State Management dialog box appears:
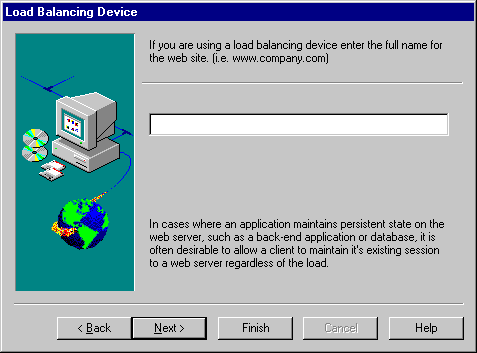
The Load Balancing Device dialog box appears:
www.yourcompany.com) and click Next.ClusterCATS creates the cluster you just configured and displays it in the ClusterCATS Explorer's left pane.
If you do not want to create your clusters using the Cluster Setup Wizard, you can create them manually. Keep in mind that if you manually create clusters, you must then add each cluster member using the ClusterCATS Explorer.
To manually add additional cluster members to your new cluster, refer to "Adding Cluster Members".
The ClusterCATS Explorer opens:
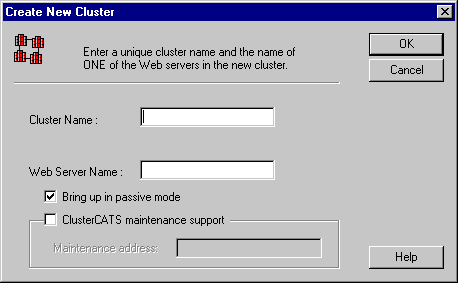
The Create New Cluster dialog box appears:
| Field |
Description |
|---|---|
| Cluster Name |
Enter a unique name for the cluster. Make your cluster names logically consistent with their purpose. For example, Sales Web, Customer Support Web, and so on. |
| License Key |
Enter GoColdFusion. This field is case-sensitive, so be sure to enter the key exactly as shown. |
| Web Server Name |
Enter the fully qualified host name (for example, doc.allaire.com) for the first server you want to be a member of this cluster.You cannot create an empty cluster; you must specify a Web server that will be part of the cluster. If this is the first server that you have added to the cluster, it is known as the Admin Manager. The remaining steps guide you in configuring the Admin Manager. |
| Bring Up in Passive Mode |
Select this checkbox to bring the Admin Manager up in Passive mode. If you do not select this checkbox, the server will be brought up in Active mode. For more information on passive/active modes, refer to "Changing Active/Passive Settings". |
| ClusterCATS Maintenance Support |
Select the ClusterCATS Maintenance Support check box to enable support for offline maintenance.. The Admin Manager must be configured with a maintenance IP address. Using maintenance support requires that your cluster support ClusterCATS dynamic IP addressing. For more information, refer to "ClusterCATS Dynamic IP Addressing (Windows only)". Offline maintenance support is only available on Windows NT server clusters. You can only set the maintenance support option when creating a cluster or adding a cluster member to a cluster. You cannot configure or modify this option after you have created and added the cluster member to the cluster. |
| Maintenance Address |
Enter the fully qualified host name of the maintenance address (for example, serv1.yourcompany.com). This field is only accessible if you selected ClusterCATS Maintenance Support. |
Your cluster appears below the Cluster Manager icon in the ClusterCATS Explorer left pane. To manually add additional cluster members to your new cluster, see to "Adding Cluster Members".
The Create New Cluster page appears:
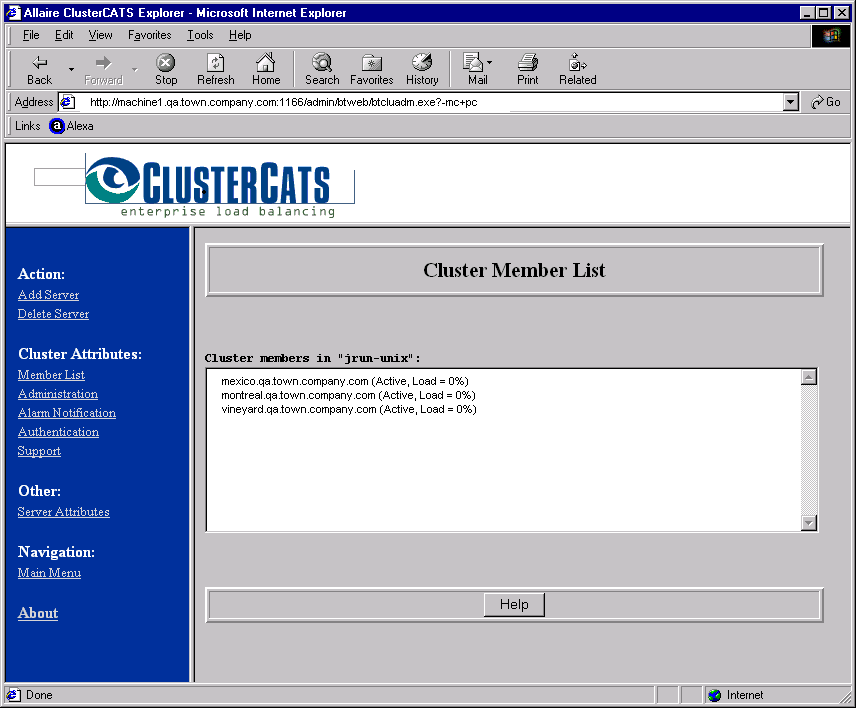
ClusterCATS creates the cluster and displays its members on the Cluster Member List page.
| Copyright © 2001, Macromedia Inc. All rights reserved. |
|